Tecplot 360 EX 2025 R1 Installation Instructions
Quick Checklist
- Computer registered
(Need help finding your computer name?) - VPN connected
- License server name and port number ready
VPN Required
!!! warning You must be connected to the campus VPN when installing and using Tecplot, especially off-campus.
Step 1 — Register Your Computer
!!! warning "Required Before Licensing" Your computer must be registered before Tecplot licensing will work correctly.
Submit the registration form and wait for confirmation before using Tecplot.
!!! note You may register multiple computers using one registration form submission.
Step 2 — Install Tecplot
Windows and macOS
- Download the installer from your WebStore order
- Run the installer and follow the default prompts
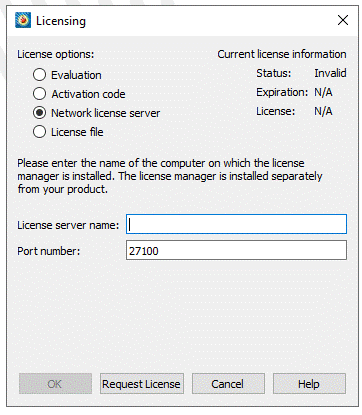
Step 3 — Configure Licensing
When launching Tecplot for the first time:
- Select Network License Server
- Enter the:
- License Manager server name
- Port number
This information is available in your WebStore order history.
Verify Licensing
To verify your license status:
- Open the Help menu
- Select Tecplot 360 EX Licensing
Your status should display:
- Valid
If Your License Is Not Valid
Check the following:
- VPN is connected
- Registration form has been submitted
- Your registration has been completed
- License server name and port number were entered correctly
!!! tip Tecplot may lose access to the license server if VPN disconnects.
!!! tip "Mac Licensing Issue (Persistent Hostname)"
Some newer Macs using Wi-Fi and DHCP may connect to the license server using a different hostname than the one registered with WebStore.

If your Tecplot license is not validating even after registration:

1. Open **System Settings → Sharing**
2. Confirm your **Computer Name**
3. Disable **dynamic global hostname** if enabled
4. In Terminal, run:

```bash
sudo scutil --set HostName "YourComputerName"
```

Replace `"YourComputerName"` with your exact computer name.

Restart your Mac after making this change.